Only Get 1 inspection; PRESCREEN!
Over the last year I have evaluated approximately 500 properties for clients. Nearly all of these inspections were associated with real estate transactions. Approximately 15% of these deals did not close for one reason or another. In many of these … Continue reading →
Over the last year I have evaluated approximately 500 properties for clients. Nearly all of these inspections were associated with real estate transactions. Approximately 15% of these deals did not close for one reason or another. In many of these cases, if the client had an idea of the types of repair issues they were not willing to accept and they pre-screened the property, they could have saved themselves some time and money. This is particularly pertinent to investors. If a property can be pre-screened against repair issues unacceptable to that particular investor, unacceptable properties won’t make it to the contract, inspection and financing stages.
The purpose of this article is to provide the inexperienced or “hands off” investor with some inspection tips that can be used to pre-screen properties for condition. This in no way precludes getting a professional home inspection as it is not complete and rigorous, but can help make sure you only have to get one. In addition, I have inspected many completed renovations; some good, some not so good. I have included some common red flags that I have encountered while inspecting fresh Renos.
Foundation/Floors
Slab on Grade ( Concrete slab) – As you might expect, there is not a lot to visibly inspect with slab on grade foundations. The most serious defect is bowing up of the slab due to hydrostatic pressure from accumulation of water from sub-slab water leaks and poor drainage. Sub-slab moisture can also cause settling, sink holes, and associated cracks. Keep an eye out for “humps” and depressions in the floor. Unlike wood framed floors, there shouldn’t be much differential elevation in a slab. Sub-slab water supply leaks can sometimes be detected by observing the city water meter. There is a small “triangle” or dial on most meters that spins to detect small water flows. If all water sources in the home are shut off yet the “triangle” or dial spins you may have a leak. Be sure to check that you haven’t detected a running toilet. Sewer issues are more difficult to detect. Sub-slab foundation repairs are almost always expensive and messy.
Concrete Block Foundation Walls w/ Wood Joist Floors – Walk the exterior of the home and look for foundation cracks greater than ¼” wide or cracks with offset. Also look for cracks in brick veneer. Note if these cracks are associated with drainage issues such as gutter downspouts discharging at the foundation, soil graded towards the foundation, or no gutters at all. Try to correlate exterior foundation cracking and drainage issues to damage to interior finished surfaces such as racked windows, sticking doors and wall cracking at window and door corners. This may signal an ongoing issue. The critical issue is whether foundation movement is active or hasn’t moved for the last 20 years. Sometimes time dependency can be inferred from prior older repairs that have or have not re-cracked. Often foundation repairs involve correcting drainage issues, re-supporting floors to unload ineffective foundation sections and installation of piles under existing foundations.
Wood Joist Floors – From the interior, try to correlate sloping floors with exterior drainage issues and foundation cracking. Often floors will slope to a corner of the house that has had an overflowing gutter at the corner for 20 years. If the home has a basement look up at the floor joists from the basement. Are there floor joists separating from beams exposing the nails? This is especially prevalent around basement stairwell openings. Back in the old days, the trimmer and header joists framing the hole cut in the floor for the basement stairwell were often not doubled and were not well supported. Then someone comes back 30 years later and finishes out the attic increasing the load. The result is a first floor that slopes to the center basement stairwell like a black hole. This is most prevalent in older craftsman style homes. Re-support in place is typically the remedy. In addition, view under all plumbing locations for rotted sub-flooring and view in general for the presence of wood boring insects; mudtubes or shelter tubes.
Reno inspection red-flags- On a couple of occasions I have inspected fresh renovation “Lipstick and Rouge” jobs. Rotted sub-flooring had not been replaced and was tiled over, weak floor areas from wood boring insect (WBI) damage and cedar support posts that were rotted at the bottom and had not been re-supported. The results were cracks in tile and new drywall signaling ongoing structural movement in the property. Finishing of interior surfaces should not begin until the structure is stabilized. Sister or replace WBI damaged wood and re-support rotted sub-flooring and columns. A good inspector will usually flush out these short term renovation approaches.
Roofing
Roof Surface- The first order of business is to determine how many layers of roofing surface are present. Stripping off multiple roof layers will increase the cost of any re-roof. The easiest area to observe roof layers is at the roof edge. There should always be a starter row at the roof edge, so you need to look for pairs of surfaces. For instance; if there are two shingle thicknesses at the edge that is a single layer. If there are 4 thicknesses; that’s 2 layers. If you have 3 thicknesses likely this is 2 layers and they did not included a starter row with the 2 nd layer. This has its own issues as the gaps between shingles at the top layer will have to rely on the older shingles below. A $15 dollar set of field binoculars will help. Check the roof surface for curling, goopy prior repairs, missing shingles and corresponding ceiling staining on the interior. These are all indicator of an aging roof surface. Also keep an eye out for oddly framed roof valleys which can trap water and debris and be a maintenance headache.
Roof Ventilation – The amount and configuration of roof ventilation can also be an indicator of roof condition. Proper attic ventilation will extend the life of roofing surfaces by keeping it cooler in the summer. Proper attic ventilation will also allow moisture out of the attic. Chronic attic moisture in homes with plywood roof decking can cause delamination of the plywood which leads to weakness and sagging between rafters and replacement @ re-roofing. This is a common unexpected reno expense with 1960’6 and 1970’s built homes. Proper ventilation includes intake openings low on the roof structure (soffit vents, low roof vents), and exhaust openings high on the roof structure (ridge vents, high roof vents, power ventilators).
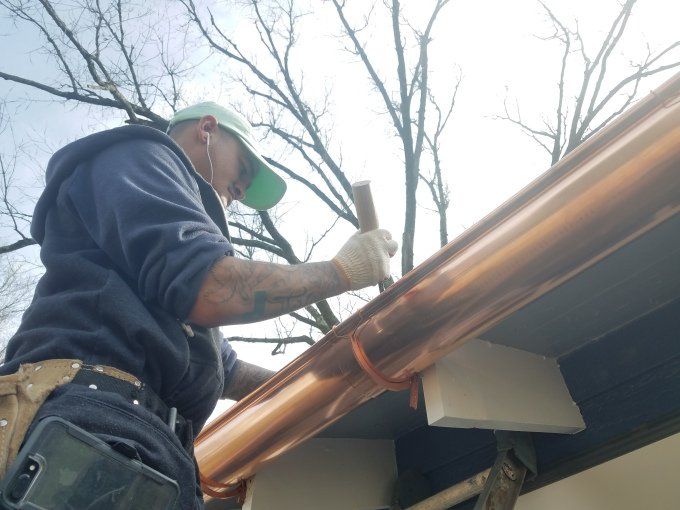
Gutters- The red-headed step child of homes. Poor guttering and downspouts are the root of all evil. Downspouts that discharge near the foundation can signal foundation problems, and crawl space moisture problems. Observe gutter seams and splices for blackness on aluminum gutters and rust on galvanized gutters. This indicates a leak. Also observe the ground under the gutters as any leaking gutter will erode the ground beneath it. Also check the size. Steep roofs with few down spouts will most certainly need 6” gutters. Make sure the roof has not been “short shingled”. The shingles should extend 1-2” into the gutter. The best gutter will be ineffective if the water can’t get to it.
Reno inspection red flags- 3rd layer roof surfaces are a no no. 2 nd layer roof surfaces over a horribly curled 1 st layer surface are almost as bad. Re-roofing over delaminated plywood decking is also a common cost cutter. Replacing a roof surface and not installing ventilation and short shingling are also common.
Negatively sloped gutters, downspouts without extensions, no gutters around bay windows, and no gutters at all are the most common gutter issues.
Exterior
Windows/Doors- In general, we are looking for areas of likely water intrusion into the house. From the interior check beneath windows for water staining and at floors adjacent to exterior doors for soft sub-flooring. From the exterior, look for rotted window/door frames and worn caulking in these areas. Also look for window sills and door thresholds that slope back to the house. Take a particular interest in the west side of the house. This side will likely see the most severe weather service. Make an evaluation of the window quality, at $200 or $300 a pop for installed low grade replacements this can get expensive.
Decks- There have been some fairly high profile deck failures this year. Deck observation criticality is proportionate to the height the deck is off the ground. Look to see that the ledger is lagged to the house rim joist or better yet is freestanding. Deck ledgers should not be hung off of brick veneer. Check to see that joist connections are not pulling out and that support posts are not rotted and railings are sound.
Siding/Veneer- Brick veneer has a tendency to crack over time. In some cases it can be an indication of structural issues, but often is a result of common thermal cycling and other benign issues. Generally, cracking will appear at weaker highly stressed locations such as window corners. See foundation/floor section . In older buildings, brick veneer mortar should be probed to make sure it is not soft and easily turns to dust. Wood and vinyl siding should be checked for rot, gaps and penetrations that need to be sealed.
Lot/Drainage- Essentially, you have to be the water. Try to understand if you were rain water on the property where would you go. Try to correlate “where you would go” to existing moist areas on the site and foundation and crawl space moisture issues.
Reno inspection red flags- Poor caulking and sealing around windows. Also, poor vinyl siding around windows. Homes that are completely renovated and the deck was not touched and is in poor condition. Large tuck pointing jobs that have been completed using the mortar caulk material instead of a qualified mason with mortar.
Electrical
Exterior- The exterior electrical system includes the service entrance wires, meter and meter base, and possibly a main disconnect panel. A modern system will have the service wires entering a weatherhead, and traveling down rigid conduit to a meter base and meter. There may or may not be a disconnect @ the exterior. If the exterior service still is cloth covered wiring without conduit and a weatherhead you will need to update this. Also, take the time to note how many meters there are. If you are buying a property with a duplex floor plan and only 1 electrical/gas/water meter/HVAC, be prepared to pay for your tenant’s utilities or add meters and segregate your systems. Oh yea; and talk to the zoning people.
Main Panel- Look to see if the panel has fuses or breakers and note the service size. 100 amps is usually enough for up to 2000 squ. ft or so depending on the # of end fixtures. Above that or if there are special electrical demands; hot tub, studio, shop, 10 people living in the house, 200 amps may be needed. If all the fuses in a fuse box are 30 amps or there are spare/burned fuses lying around, the service may not be adequately serving the property. In addition, old fuse boxes with multiple auxiliary panels indicate an upgrade might be needed. Always consider upgrading fuse panels. There are a couple of 60’s and 70’s vintage panels that should be noted. The Federal Pacific and Zinsco/Sylvania panels have had some documented issues over the years. Search the web with keywords Federal Pacific, panel, Fire.
Wiring- There are a lot of home owners that think they are electricians. If the property has a basement, look for spliced wiring connections without wire nuts and outside of junction boxes. If you see more than one or two you probably have some “handyman” wiring to undo. Also, be on the lookout for knob and tube wiring in older homes. This wiring should not be spliced into without a proper junction box and should not touch insulation in the attic. I recently saw some melted knob and tube wiring insulation in a fresh renovation. Always a good idea to replace knob and tube wiring as part of any renovation. You should also check to see that you have some sort of earth ground either in the form of a grounding rod or connection to a metal water pipe or both.
Outlets- Pre-60’s vintage homes will most likely have ungrounded outlets that are 2-prong. This is acceptable by most electrical codes as the home is grandfathered back to the code from which it was originally built. The trouble starts when home owners and renovators replace the two-prong outlets with modern 3-prong outlets and do not make concessions for the addition of grounding or supplemental shock protection. This misleads the user into thinking the 3-prong outlet is grounded and is against the rules. Ungrounded 3-prong outlets can be checked for using a $3.00 3-prong outlet tester. There are alternatives that are allowable in most municipalities. Most codes allow a Ground Fault Circuit Interrupter (GFCI) outlet to be installed in place of a two prong outlet as long as it is labeled “ungrounded”. In addition, most codes allow GFCI breakers to be installed in the panel that service ungrounded 3-prong outlets as long as the outlets are labeled “GFCI protected”. Also 2-prong outlets can be re-installed and are still manufactured and stocked by home improvement stores. Codes vary and an electrician should be consulted.
Reno inspection red flags- Ungrounded 3-prong outlets, spliced wiring, wiring connections outside junction boxes, missing junction box covers, double tapped circuit breakers, bonded neutrals and ground wires in an auxiliary panel, abandoned wiring, wiring touching the ground, messed with knob and tube wiring, water heaters and disposals without conduit, poor panel locations, wiring to a detached garage improperly strung over head, exposed wiring on interior surfaces, exposed wiring on the exterior.
Heating /Cooling
Central- Try to determine the age and capacity of the system. The data plate on the exterior A/C condenser or gas pack unit will have a model# and serial#. Often, not always, the date of manufacture will be coded into the serial #. For instance, a recent condenser serial # was 1287A19529. This unit was manufactured the 12 th week of 1987. This may work similarly with furnace serial #’s. The capacity on an A/C condenser is often encoded into the model # divisible by 12. For instance, the matching condenser model # was 565BJ018. This unit is a 1.5 ton unit; 18/12. The furnace capacity will be listed as a BTU capacity. An accepted and conservative rule of thumb for A/C system sizing is 600 square ft @ 8’ ceiling height for every Ton of A/C. This can be increased for a home with modern insulation levels.
Check the return air filter and ducting for cleanliness, this will give an indication of whether there has been regular maintenance. Check the attic finished space for auxiliary window A/C units. These usually indicate the A/C unit can’t handle the extra attic cooling load in the summer. Also check to make sure the attic finished space has a heat source. Areas without a heat source cannot be counted in the finished square footage of the property. Be on the look-out for white tape on joints of older duct work and heat shields over basement furnaces made of this material. It may contain asbestos.
Radiant Heat- Be weary of ceiling radiant heat and old radiant heaters. They are high energy users and are essentially not inspectable except to check for operation. In addition, going with a central system will free up electrical circuits.
Reno inspection red flags- Dirty HVAC units plugged with construction dust with no filter.
Ventilation
Crawl space- On your visit to the property you probably won’t go into the crawl space so I will not dwell here. Be assured though the crawl space is an important part of the property. Be aware of drainage issues that could be adding moisture to the crawl space; poor grading, gutter downspouts. Pop the hatch open and see if there is a plastic moisture barrier. Check to see if crawl space is vented to the exterior. If you have downspouts discharging at the foundation, no plastic moisture barrier and vented crawl space it’s a good bet you have mold to some extent.
There is a newer crawl space ventilation theory out there we should all be aware of. Traditional thinking and codes require a certain square footage of open crawl space ventilation per square foot of crawl space. During the summer inTennessee, the crawl space is being ventilated with 80 to 90 % humidity outside air. I can’t tell you how many crawl spaces I saw this summer with puddles of water from sweating HVAC ducts. It may be more effective in some crawl spaces to close up the crawl space vents and continuously exhaust air from the crawl space with a small fan. Each crawl space should be evaluated on a case by case basis but humidity levels should be maintained below 50%.
Reno inspection red flags- Crawl space disorder, wood debris, trash and garbage, lack of plastic moisture barrier, lack of ventilation, dryer venting into the crawl space.
Plumbing
Water Heater- Try to determine the age and capacity of the water heater. Generally, the manufacture year will be included in the serial# similar to the HVAC system. The capacity is often included in the model #. Smell the water. If there is a distinct sulfur odor you may have bacteria in the water heater.
Supply Plumbing- The important issue to determine is functional flow. When the toilet is filling and lavatory faucet is on, you should still get a reasonable flow of water from the shower head. If functional flow is not evident, this is most likely a result of older galvanized piping with corrosion on the internal diameter. We often incorrectly say that a supply system in this condition has bad “pressure”. If you place a pressure gauge in the system it will still read between 65 and 80 psig. We should say we have bad “flow”. If there is poor flow at only 1 faucet check the aerator for debris. If there is a basement, find where the plumbing comes into the house and determine if it is copper or galvanized steel. Also, note approximately what % of plumbing has been upgraded. Be weary of PVC supply plumbing. This often is installed as a cheap alternative to copper and rarely is properly supported or installed.
Drain Plumbing- Run all of the plumbing faucets and check under the sinks for leakage. If there is a basement, check for leaks after all the plumbing has been operated. Note how much cast iron drain piping is remaining. Check the sinks for “S” traps. “S” traps indicate an unvented plumbing fixture that may at times be open to the sewer system and thus may emit sewer gases. Mechanical studor vents can normally be installed to correct this. Gurgling sinks are also an indication of unvented plumbing fixtures.
Reno inspection red flags- PVC supply plumbing, temporarily patched piping, poor water heater safety valve discharge lines, lack of conduit on water heater electrical, poor gas water heater venting, disconnected drain lines, no laundry room drain line, leaks,leaks,leaks.
Interior
General- Essentially you should be looking for evidence of water in the interior of the property. This can be from leaking plumbing or from water from the exterior. Also, note the condition of floors and floor coverings and wall condition.
Believe it or not this is the short list. The information above will not solely provide a complete evaluation of a property. A real estate property is made up of a complex set of components but it is surely not rocket science and once broken down into its components; is manageable. Determine what components are of greatest value/concern to you and pre-screen your properties with a more critical eye. Then give us a call and we’ll check it out…..Inspector Bill Carlson